Natural Moisturizer, Solid Lotion Bar & Lip Balm Recipe

natural moisturizer

Disclaimer: This post contains affiliate links, which means I may receive compensation if you make a purchase through these links.  There is no cost to you. See my Disclosure Policy for more information. 

My body is super lame when it comes to allergies and skin sensitivities.  Many, many times I have played the game “what caused those hives?”  with answers varying from a cat scratch or dog “kiss”, to the stainless steel back of my watch face, to fragrance or other chemicals in soaps, body washes and lotions.  
natural moisturizer
coconut oil

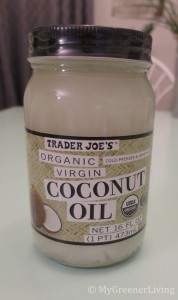
After realizing that some of my skin irritation was caused by topically applied products, I started making most of the products I put on my skin from real, natural ingredients.  The first necessity was an everyday soap and body wash which I wrote about here, and the second was a moisturizer.  After a quick google search, I found that coconut oil alone can be used as a skin moisturizer.  Considering I haven’t died from eating coconut, I figured it would be safe to put on my skin (this time I was right…almonds seem to be another story).  I found this coconut oil at Trader Joe’s:

Moisturizer

I love coconut oil as a face and whole body moisturizer.  It works really well for my skin, makes it glow witohut looking oily, and has the added benefit of naturally being about SPF 4.  However, to survive the dry New England winter, I noticed my skin was still peeling on my face.  I did a little research and found in this Red and Honey Post that because coconut oil absorbs quickly (which is good for not making skin look greasy), it doesn’t moisturize deeply.  I found many excellent reviews for argan oil as a skin moisturizer, and have friends who have told me how great it is.  I have been using certified organic, 100% pure & natural Radha Argan Oil.  I first apply coconut oil to my face, then use just 2-3 drop of Argan oil for my entire face.  This leaves my face silky smooth and glowing.  

natural moisturizer
argan oil

While I love my coconut oil and Argan oil regime, I sometimes need a heavier moisturizer.  By combining coconut oil with cocoa butter and beeswax, I made a moisturizer with a higher melting point that seals in moisture better than coconut oil alone.  Plus, lotion in solid form is great for air travel 🙂

Due to variability in the form of the ingredients, and how sensitive this recipe is to the ratios of each ingredient, I used a kitchen scale to weigh the coconut oil, cocoa butter, and beeswax.  Too much beeswax and the lotion will not melt on skin; too much coconut oil and the bar will melt in your hands before you can apply it to your body.

After some trial and error, this is the recipe I like
natural moisturizer
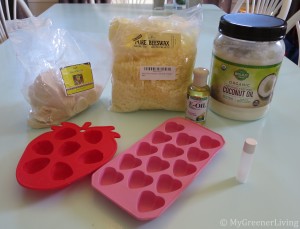
ingredients for solid lotion bars and lip balm
Ingredients

37 grams beeswax

55 grams cocoa butter

55 grams coconut oil

15 drops liquid vitamin E (or 2-3 vitamin E tablets, pierced and liquid squeezed out)

Optional: red raspberry seed oil (I used 10 drops)

Optional: essential oils for scent and additional skin benefits (I omitted)

Yields: about 3/4 cups lotion, which resulted in about 17 mini bars, about 0.3 ounces each.

Instructions
  1. Weigh the beeswax, cocoa butter, and coconut oil in a microwave safe glass container.  

    natural moisturizer
    measuring ingredients for lotion bars and lip balm
  2. Microwave on 50% power for 5 minutes, stirring every 30-60 seconds.  If the wax isn’t completely melted at this point, microwave for an additional 30 seconds on full power, then stir.  Continue microwaving, stirring every 15 seconds, until the wax has completely melted.  

    natural moisturizer
    melting the butters/oils for lotion bars and lip balm
  3. Add the vitamin E, red raspberry seed oil, and essential oil(s), if using.  Stir to evenly distribute.
  4. Pour into molds.  

    natural moisturizer
    lotion and lip balm hardening in their molds
  5. Let cool and solidify for several hours or overnight.

    natural moisturizer
    solid lotion bars

I use silicone ice molds to make mini lotion bars.  Any silicone or plastic mold, or even ice cube molds, should work.  

Tip from my friend at Dry Creek Soaps: If you have trouble removing the lotion from a plastic mold, freeze for a few hours, “crack” the mold like an ice cube tray, and flip the mold.  If any lotion bars remain in the mold, firmly smack the mold upside down on the counter.  

This lotion is also a good consistency for lip balm; it can be poured into lip balm tubes as well.  I reused some empty tubes I had (because yes, I actually manage not to lose chapstick before it’s gone). 

Ingredient Information

In case you want to know more about what is in these bars, here’s some information about each of these ingredients:

coconut oil – great overall moisturizer, natural SPF 4, moderately high comedogenic*

cocoa butter – moisturizes, seals in moisture, moderately high comedogenic* 

beeswax – seals in moisture to protect skin, moderately low comedogenic*

vitamin E – antioxidant, moderately low comedogenic*

red raspberry seed oil – SPF 40 in pure form, in this lotion adds minute SPF

*comedogenic ratings from Beneficial Botanicals 

I found all ingredients for this recipe on Amazon.  You may also be able to find them at natural food stores.  I typically buy my coconut oil at Trader Joe’s or BJ’s Wholesale Club.

Beeswax – be sure to purchase unfiltered unless you’re prepared to filter your wax.  I like the small pellets because it melts easier than a block.  

Cocoa Butter

Coconut Oil – Trader Joe’s, BJ’s, Amazon

Vitamin E

Red Raspberry Seed Oil

Liquid Castile Soap from Bar Soap

Disclaimer: This post contains affiliate links, which means I may receive compensation if you make a purchase through these links.  There is no cost to you. See my Disclosure Policy for more information. 

I’m going to be nice and give you the recipe right from the start 🙂

Update 12/1/2016: I now make my liquid soap using potassium hydroxide lye and am much happier with that product.  You can see how I make that improved liquid soap here.

liquid soap from bar soap

Liquid Castile Soap from Bar Soap

How to make liquid castile soap from a bar of castile soap

Ingredients
  

  • 1-4 oz bar castile soap
  • 1 tbsp glycerine
  • 3/4 gallon 96 oz water
  • Optional 1 tsp liquid vitamin E
  • Optional a few drops of essential oils

Instructions
 

  • 1. Grate the bar soap. You can get a good arm workout in grating by hand with a cheese grater. Or you can chop up the soap into 4-8 pieces, toss in your blender and pulse until you have small crumbles. I used the blender.
  • 2. Pour water into a large pot. Ensure there is at least 2-3 inches between the top of the water and top of the pot. Boil the water for one minute (See Note 1). Turn burner to low.
  • 3. Allow the water to cool for a few minutes, then pour in the grated soap. Gently stir to dissolve the soap into the water. It should dissolve in a minute or two unless you had large chunks of soap. Those took about 5 minutes to dissolve. Turn off the burner.
  • 4. Add the glycerine, vitamin E and essential oils if using. Stir to distribute.
  • 5. Let sit several hours or overnight to cool. The soap will remain very watery, but still works like soap! Some of the soap may separate (cloudy at the bottom of the bottle), just give it a quick shake before using.
  • 6. Pour into your soap dispenser and enjoy!

Notes

Note (1): According to the Center for Disease Control, boiling water for 1 minute will make it safe to drink. While I think my tap water it pretty safe (I have been drinking it for 6 years), I boil the water to kill anything that may be living in it, so my soap doesn’t start growing things. If you use distilled water, you can turn off the heat as soon as the water comes to a boil.
Before I started my healthy/natural kick, I had another problem.  (Ok, I have a lot of problems.  We’ll just tackle one at a time…)  It seemed for every gift giving occasion, someone (or multiple someones) gave me some fancy bar soap.  Are they trying to tell me something?  Do I really smell that bad?  Self-doubts aside, my problem was that I don’t really like bar soap.  It’s too difficult to keep looking nice and clean next to a bathroom sink, and I don’t like how it feels like it’s leaving residue on my skin when I use bar soap in the shower.  I am definitely a liquid hand soap/body wash girl. 

Update 4 Jan 2017: I have learned that “real soap” – castile soap and the home made ones without chemicals do not leave that residue on my skin, the sink, the shower…and I now love bar soap.

So, what to do with all this bar soap?  Per my usual, I turned to the internet (specifically Pinterest, my weakness).  I found a recipe that involved grating up the bar soap and adding it to heated water until it dissolved.  I tried it.  Worked great!  I used this lovely almond scented soap as a hand soap in my bathrooms for a couple months.  Then one day I ran out of body wash.  Body wash is just glorified liquid soap, right?  So why not use this lovely smelling liquid hand soap?  BECAUSE YOU’RE ALLERGIC TO EVERYTHING, IDIOT!  Well, apparently I forgot about that at the time.  Or I thought because it was ok on my hands it would be ok everywhere.  But I was very wrong.  I got contact dermatitis all over my body (have you ever gotten poison ivy? Yup, it was that reaction).  It took over a week for the contact dermatitis to go away.  That was not fun, but at least I did this stupid experiment in the winter when it was easier to cover up.  

This lovely adventure in discovering a new allergy led me to determine that I needed to get rid of chemicals.  I could not handle being allergic to soap.  So I turned back to the trusty internet.  This time I was smarter, and looked for recipes for fragrance and chemical free soap.  And this is when I learned about  castile soap.  The liquid stuff looked great, but over $15 for 32 ounces?  That was not going to be affordable as an every day and and body soap.   (I did purchase Dr. Bronner’s unscented liquid castile soap for a face wash and I do really like it.)  I immediately went out and bought the first castile bar soap I could find. It was Kirk’s Original Coco Castile, which I found at Walmart.  

Kirk’s soap is vegetarian (actually vegan) and contains no artificial ingredients.  Ingredients: coconut soap, water, vegetable glycerin, coconut oil, natural fragrance.  According to the the FAQ’s page of Kirk’s website, the answer to “What kind of fragrance do you use in your soap?” is “The fragrance is less than 1% of the total ingredients in Kirk’s products. The fragrance is a combination of essential oils from the pine and citrus family and is Phthalate-Free. For those with highly sensitive skin we recommend our Kirk’s Original Coco Castile Fragrance Free Bar.” 

Since I have not had sensitivities to and of the listed ingredients, or pine or citrus, I guessed (correctly) that this soap would be safe.  It is so gentle that I can, and do, use it on my face.  

I use this soap as a hand soap, face soap, body wash, and any time my home made cleaning recipes call for liquid castile soap.

If you’re looking for a super-sensitive liquid soap that is less expensive than liquid castile soap, or just want an inexpensive liquid soap, here’s how to make your own!  

Recipe:

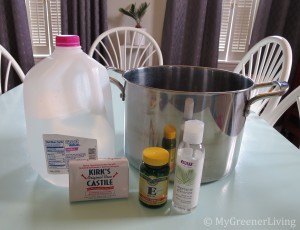
1-4oz bar castile soap

1 tbsp glycerine

3/4 gallon (96 oz) water 

Optional, 1 tsp liquid vitamin E

Optional, essential oils

Liquid_soap_1

Instructions:

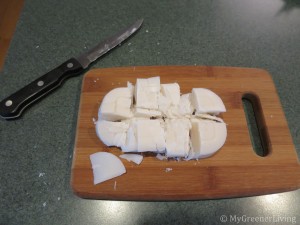
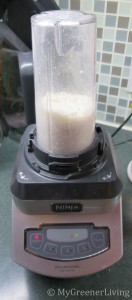
1. Grate the bar soap. You can get a good arm workout in grating by hand with a cheese grater. Or you can chop up the soap into 4-8 pieces, toss in your blender and pulse until you have small crumbles. I used the blender.

Liquid_soap_3     Liquid_soap_5

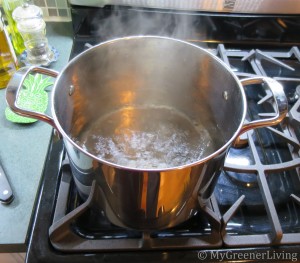
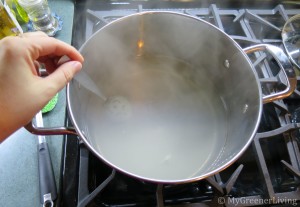
2. Pour water into a large pot.  Ensure there is at least 2-3 inches between the top of the water and top of the pot.  Boil the water for one minute (See Note 1).  Turn burner to low heat.

Liquid_soap_6

3. Allow the water to cool for a few minutes, then pour in the grated soap. Gently stir to dissolve the soap into the water.  It should dissolve in a minute or two unless you had large chunks of soap.  Those took about 5 minutes to dissolve.  Turn off the stove. 

Liquid_soap_7

4. Add the glycerine, vitamin E and essential oils if using. Stir to distribute.

5. Let sit several hours or overnight to cool. The soap will remain very watery, but still works like soap!  I think it could even be watered down more and be just as effective – I’ll update as I experiment with this.  

6. Pour into your soap dispenser and enjoy!  If the soap appears to settle with time, just give it a quick flip/shake and it should be as good as new!

Liquid_soap_9

Note (1): According to the Center for Disease Control, boiling water for 1 minute will make it safe to drink.  While I think my tap water it pretty safe (I have been drinking it for 6 years), I boil the water to kill anything that may be living in it, so my soap doesn’t start growing things.  If you use distilled water, you can turn off the heat as soon as the water comes to a boil.

I chose not to add any essential oils due to my skin sensitivity. If you want scented soap, add just a couple drops at a time. You can always reheat soap in small batches and add oils to your smaller batch.

My first try, I used 1/2 gallon (64 ounces) water.  After the soap sat in a bottle for a month, it was too thick to pump out of a regular soap or lotion pump.  I’ve re-made this soap with more water, and I like it much better.

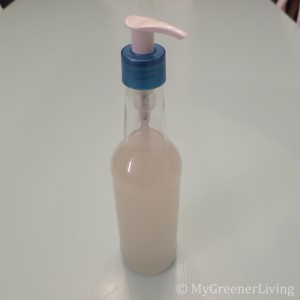
Odds are you have a hand soap pump bottle in your house.  I am all about reusing, so go ahead and keep using what you have!  Or, get creative: I have found that some lotion bottle pumps fit on glass beer bottles. The threads on the bottle and cap don’t align quite right so it will leak if turned on its side, but it fits well enough to use.  

Insider tip #1: Don’t go adding extras to your whole 1/2 gallon batch of soap. I decided to add that Aveeno Oatmeal bath stuff (which I bought to help with that fun contact dermatitis – works great for that application!). To my whole batch. Thought it would make it softer and soothing. All it does is separate and make my soap cloudy, and clog the pump.  And it took me over a year to go through a 96 ounce batch.

Insider tip #2:  As you’re making your soap, at step 3, you might think it is a good idea to use your hot water to dissolve the soap that is stuck in your blender.  If you chose to do this, please use extreme caution!  Because if you fill your blender â…“ with water, and blend, the entire volume of your blender is instantly filled with beautiful white suds!  These suds are pressurized!  When you open the blender, warm soapy water will spray everywhere!  If the water is too hot, you could burn yourself, and I really don’t want that to happen.  If you insist on making a mess, please ensure that the water has cooled first.  


Cost breakdown:

Water: $0.0075 (My water rate is roughly $0.01/gallon, so cost here is 3/4 of one cent. I’ll round up to $0.01 for simplicity in this calculation. )

Kirk’s bar soap: $3.28 + 7% sales tax = $3.51 for 3 bars = $1.17

Vegetable glycerine: $2.99 for 4 oz bottle, ½ oz used in this recipe = $0.38

Total cost for 96 ounces: $1.56

I had been paying $3.97 + tax for 56 ounces of store brand hand soap 

Mine: 1.625¢/ounce

Theirs: 7.09¢/ounce


Where to buy ingredients:

Kirk’s bar soap can be found in a 3  pack in the soap aisle at Walmart ($3.28 for a 3 pack currently), or on Amazon

Glycerine can be purchased from a pharmacy.  It is not prescription, but behind the pharmacy counter.  I bought my NOW solutions vegetable glycerine on Amazon because I wanted to ensure it came from vegetable sources.  

Vitamin E capsules can be purchased at almost and drug store, grocery store, Walmart, Target, etc. in the vitamin aisle.  You can just pierce the gel capsule and squeeze the liquid into the soap.  Or purchase liquid Vitamin E on Amazon 

Essential oils can be purchased on Amazon (I like NOW brand), or from other companies like doTERRA and Young Living.  I have used doTERRA with success as well.  

Credits: I got the idea for making liquid soap from a bar from One Good Thing by Jillee