Did you know that there is an extremely inexpensive and simple jewelry cleaner, for cleaning gemstones? It keeps them looking sparkling new, takes about a minute, and costs just pennies! The secret? Baking soda!
Disclaimer: This post contains affiliate links. See my Disclosure Policy for more information.
What I use as a jewelry cleaner for my gemstone jewelry
I have never purchased a jewelry cleaner kit. I know they exist, but that is honestly all I know about them. Baking soda and a toothbrush is all I have ever used to clean my gemstone jewelry.
The tool (toothbrush)
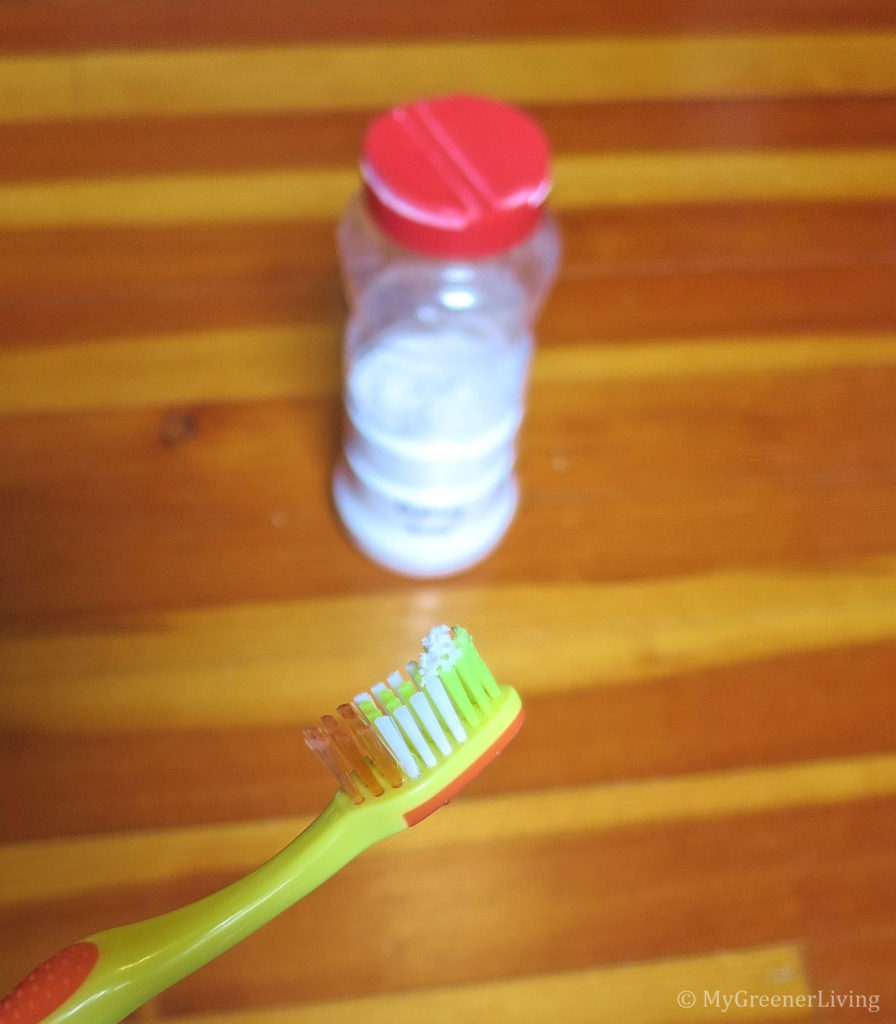
My jewelry cleaner tool is a toothbrush. My toothbrush of choice is a children’s toothbrush with the softest bristles possible. The toothbrush does not need to be new. I like to save my old toothbrushes for dirty jobs around the house. If I was using an old toothbrush that had been used for tooth brushing, I would just soak the toothbrush bristles in a water/sodium perbarbonate (oxiclean) solution like #9 in my uses of sodium percarbonate list, just to kill any bacteria that may have lingered on the toothbrush, before using it on my jewelry. However, I don’t have kids and didn’t have any extra soft toothbrushes laying around. I was able to find this 5-pack for $1.00 at Walmart.
Baking soda is quite inexpensive, typically about $1.00 per pound, and I use a small pinch for each gemstone I clean.
How I clean my gemstone jewelry
I use this jewelry cleaner for the gemstones only – not the metal. However, for the jewelry I have cleaned, I had no adverse affect of the baking soda-water solution contacting the metal (sterling silver, 14kt gold) setting.
If the gemstone is a removable pendant on a necklace, bracelet, hoop earrings, etc., I remove the gemstone from the chain, since I will be focusing on cleaning the gemstone and not the chain.
I wet the bristles of the toothbrush, and dip the tip of the toothbrush bristles in the baking soda (see photo below).
Next I place the baking soda covered toothbrush bristles on the gemstone and very gently brush all over the gemstone, carefully brushing between all prongs of the setting, and ensuring that I brush all surfaces of the stone.
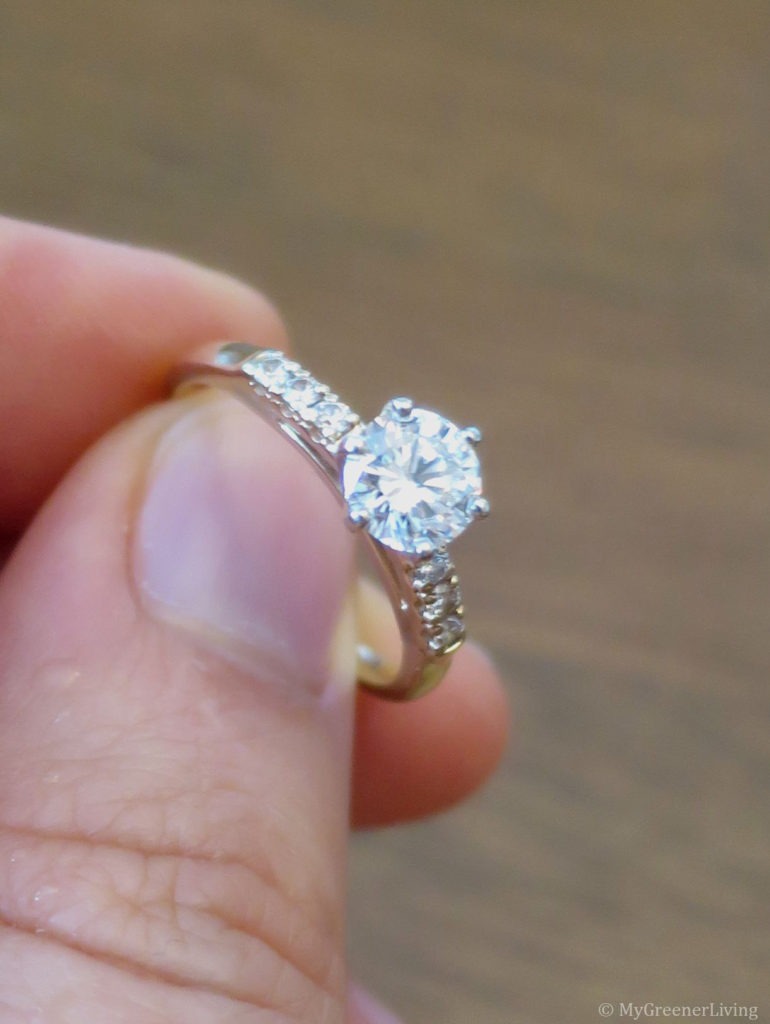
Finally, I rinse the stone and toothbrush, and pat dry the stone using a soft, absorbent towel. Now I have a beautiful gemstone that sparkles like new!
Step 2. This is all the baking soda I need to fully clean my solitaire gemstone ringStep 3. gently brushing all over the gemstones in the ringstep 4. my ring sparkles like when it was new!
Cautions about my gemstone jewelry cleaner
I personally have never had any issues scratching or damaging my gemstones or settings by cleaning my gemstone jewelry in this way, however I cannot guarantee the same for anyone else. If you choose to try this jewelry cleaning method, you are doing so at your own risk, and I am not responsible for any damage that occurs to your jewelry.
I have only used this jewelry cleaning technique on precious or semi-precious gems, set in sterling silver or 14 karat gold. I do NOT recommend this for fashion jewelry, as I have no idea how this will work.
Gemselect lists the Mohs hardness value of many gemstones. I personally have used this on harder gemstones like sapphire, amethyst, and diamond. Personally, I would try it on gemstones with a Mohs hardenss value of 7 or higher. I would NOT use it on opals or pearls, which are very “soft”. I typically just wipe those with a microfiber cloth.
Cost to use my gemstone jewelry cleaner
Extra soft toothbrush pack of 5: $1.07
Baking soda costs $0.99 for 1 lb on Amazon and in grocery stores. The amount used to clean each gemstone is just a pinch – far less than 1/16th teaspoon, the smallest measuring spoon I own. I guess I use about 1/8 of that 1/16 tsp.
($0.99/1 lb)x(1 lb/454 g)x(4.8g/1 tsp)x(1/16 tsp)x(1/8)=$0.0000818: tiny fractions of pennies.
I only clean 3 gemstones, each monthly. $0.0000818 x 12 x 3 = $0.0029. Less than 1/3 of 1 cent in cleaning supplies annually to clean my jewelry (Plus the upfront cost of the toothbrush, which will probably last forever).
In January I got a night guard – a mouth guard for my teeth to protect them from damage from grinding my teeth in my sleep. The night guard itself was far from inexpensive, but I consider non-cosmetic medical expenses worthwhile. This guard protects my teeth from excessive wear, and alleviates tension headaches to a small degree.
Disclaimer: This post contains affiliate links. See my Disclosure Policy for more information.
When I received my night guard, the care instructions were quite simple: wash with antibacterial soap after each use. Unfortunately, I am not a big fan of antibacterial soap. According the the FDA, the active ingredient that makes a soap antibacterial – triclosan – doesn’t necessarily make soaps more effective at preventing illness than regular soap and water, may be a hormone disruptor, and contributes to the rise of antibiotic resistant bacteria. I avoid antibacterial products, specifically those containing triclosan, whenever I can, and I did not want to have to use it daily just to be able to safely use my night guard. I immediately began trying to find another safe and effective way to sterilize and clean my night guard.
Additional disclaimer: I am not a doctor or dentist. I have chosen NOT to follow the instructions provided by my dentist, and I am assuming my own personal risk by doing this. I recommend that everyone discuss health related items with their own medical professionals, make decisions accordingly.
How do I know my night guard is clean?
I must admit I have not been very scientific about this. I have not bought a bacteria test kit. Instead, I have been relying on my nose. Bad breath is often caused by bacteria in the mouth, and this can be exacerbated by dry mouth. I happen to be a mouth breather in my sleep, so my night guard smells pretty unpleasant when I first remove it. Therefore, I determine if my night guard is clean by if it smells bad or not.
Three successful methods to clean my night guard
I have tried three different methods and recipes for cleaning my night guard, and all seem successful. My favorite is my third attempt, sodium percarbonate – it is the least expensive and least likely to damage the night guard in the long run.
three different, yet all successful, night guard (mouth guard) cleaners
Cleaning method 1: UV light sanitization
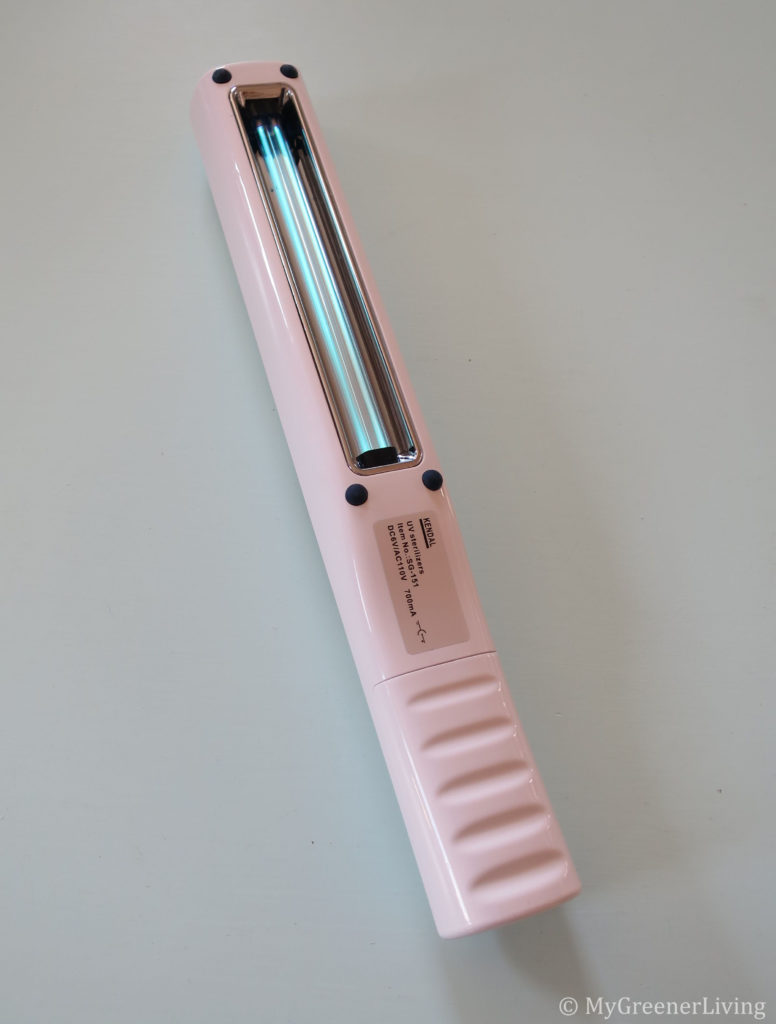
I was still using my UV sanitizing wand for household cleaning, and this was the first thing I thought of to clean my night guard without antibacterial soap. Since I know UV light can degrade certain types of plastic, I looked up what types of plastic are usually used in night guards, and if these materials are UV resistant or not. I am not sure the specific brand of my night guard, but my dentist told me it is a “hard/soft” night guard, so I am guessing it is this brand or similar, making the plastics polyurethane and copolyester (which are BPA free for those curious). I found that polyurethane will break down with “prolonged exposure” to UV light, and copolyester is too broad a term for me to really figure out UV resistance.
From my observations of plastics breaking down in the sun, this happened over time, with long exposure to sun. I was planning to expose my night guard to UV light for 20-40 seconds per day. Until I came up with a better solution, I decided it was worth the risk of slight degradation and eventual damage to the night guard. I figured it was more likely that I would grind through and break the thing and need it replaced before I would cause enough UV degradation to actually matter.
How to clean with the UV light wand
After using my night guard, I rinse under running water and quickly brush with my toothbrush, pat dry, then use the UV light wand. To use the UV wand, I place the night guard on a table, turn on the UV wand, hold the light of the wand over the night guard for 10-20 seconds, flip the night guard over, hold the light over the other side of the night guard for another 10-20 seconds, then turn off the light and put the night guard in its storage container.
After using the sanitizing wand, all bad smells are completely gone.
While the UV light wand was a successful cleaning method, I was looking for something that did not use UV light, which may damage the plastic night guard over time. I also wanted something that was easier to take with me when I travel. My friend mentioned that she bought Retainer Brite retainer tablets for her daughter’s metal/plastic retainer, and it never had a smell when the tablets were used. I looked at the ingredient list (the “new” formula, as of August 2019 there are a lot of comments about the formula changing). Items in square brackets [ ] are my notes about the ingredient’s common name and/or cleaning function.
Sodium percarbonate [bleaching/oxidizing agent; OxiClean active ingredient]
Sodium sulfate
Sorbitol
Tetraacetylethylenediamine (TAED) [commonly used as a bleach activator in laundry products]
PEG-180
Sodium lauryl sulfoacetate
Flavor
PEG-8
Magnesium stearate
Coloring
I recognized the first three, and 6th, ingredients as ones I use as natural or less harsh cleaners that I use in my home: baking soda, washing soda, citric acid, and sodium percarbonate. I made my own night guard/mouth guard cleaner from those four ingredients. Here’s my recipe:
Mix ingredients well and store in a sealed container.
How to use the cleaning mixture
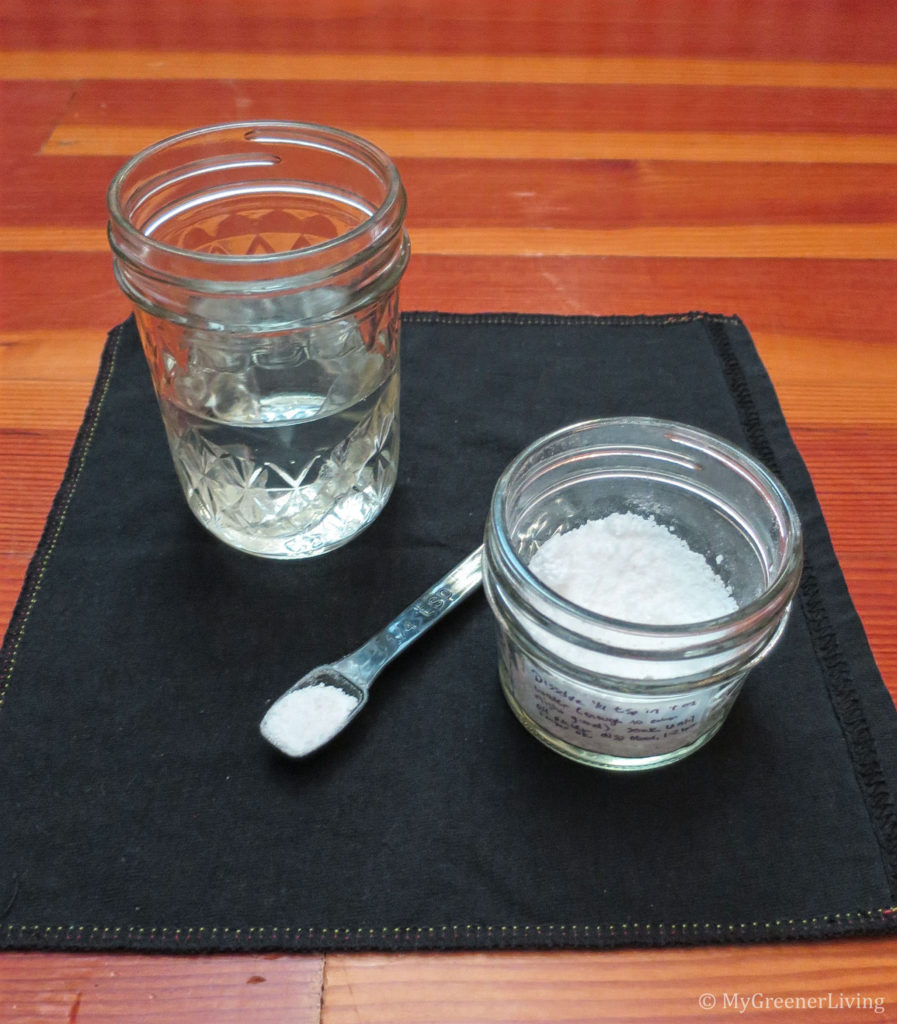
After using the night guard, I rinse under running water and quickly brush with my toothbrush. I put my night guard in a water tight container (I use an 8oz mason jar), scoop 1/4 teaspoon mixture into the container with the night guard/mouth guard, and add water to cover night guard (about 4 oz). I allow to soak until all powder has dissolved (about 2 hours) or all day*. After soaking, I rinse the night guard and soaking jar with clean water and pat dry the night guard before using again.
*This works for all plastic mouth guards. Long soak times are not recommended for retainers with metal components, and I would NOT soak anything with metal parts in this solution longer than a few minutes. I do not think this solution would be effective with such a short soak time, because the sodium percarbonate (OxiClean) does not dissolve that quickly.
As an added bonus, after several uses I noticed that the yellowing of the plastic night guard started to disappear. It did not completely go away, but the night guard became more clear, like when it was new.
Cleaning method 3: sodium percarbonate
Once I discovered that my night guard/mouth guard cleaning mixture of balking soda, washing soda, citric acid, and sodium percarbonate (OxiClean) did a great job of cleaning my night guard, I started wondering what part of that cleaner really was doing the cleaning. Citric acid in water can help kill bacteria by lowering the pH/creating an acidic environment. But super washing soda is alkaline/a base, so those ingredients would essentially cancel each other out. Baking soda neutralizes acids and bases, so baking soda, washing soda, and citric acid together might not be doing much in my recipe. I thought it was probably the sodium percarbonate (OxiClean) doing the real work in my night guard/mouth guard cleaner so I put it to the test.
How to use the cleaner
After using the night guard, I rinse under running water and quickly brush with my toothbrush. I put my night guard in a water tight container (I use an 8oz mason jar), scoop 1/16 teaspoon sodium percarbonate into the container with the night guard/mouth guard, and add water to cover night guard (about 4 oz). I allow to soak until all powder has dissolved (about 2 hours) or all day*. After soaking, I rinse the night guard and soaking jar with clean water and pat dry the night guard before using again.
*This works for all plastic mouth guards. Long soak times are not recommended for retainers with metal components, and I would NOT soak anything with metal parts in this solution longer than a few minutes. I do not think this solution would be effective with such a short soak time, because the sodium percarbonate (OxiClean) does not dissolve that quickly.
After soaking in just sodium percarbonate, my night guard was just as clean as soaking with the mixture, and as sanitizing with the UV light wand. I considered this method the most successful because it travels well (unlike the UV wand), and is both easier to use and less expensive than the mixture.
Also, like with the cleaning method 2 mixture, the sodium percarbonate lightens the yellowing of my plastic night guard. There is still some residual discoloration, but it looks much more like new than before I used any cleaner with sodium percarbonate.
Cost
It cost me $13.50 for 5lb of sodium percarbonate on Amazon, the best price I have found for this product (unless I want to buy 50 lbs, which would probably last me a couple lifetimes).
Based on my measurement of 1 Tablespoon of sodium percarbonate weighing 14.8 grams, and 5 lb=2267.96 grams,
5 lb of sodium percarbonate contains (2267.96g/14.8g) = 153.24Tbsp
153.24Tbsp/5lb bag x 3 tsp/Tbsp = 460.127 tsp
460.127 tsp x 16 uses/ teaspoon = 7362 uses/5lb bag
$13.50/7362=$0.00183 per use
$0.00183 per use x 7 days = $0.013 = Less than 2 cents per week to keep my night guard clean!**
**I have assumed the cost of water is negligible, but the cost of the sodium percarbonate is so low that this might not be a great assumption. This cost varies based on the water rate, use of bottled water, well water, etc.
For comparison, the Retainer Brite tabs are $13.48 for 96, which is about $0.14 per use or $0.98 per week. These specialized retainer cleaner tabs cost ($0.98/$0.013)=75 times more than my sodium percarbonate cleaner! For me, the sodium percarbonate is a frugal and easy choice to clean my night guard.