How I spiced up leftovers: mixed grain veggie casserole to “fried rice”

I am always looking for recipes to make quick, healthy, and tasty dinners.  Often I make big batches and eat the same meal throughout the week, so I really only have to “cook” a couple times a week.  Usually I am ok eating the same thing day after day, but sometimes I get bored.  Last time I made my mixed grain and veggie casserole, I ate it once and just wasn’t in the mood for it again.  Maybe I was just craving unhealthy food, but I decided to turn my leftovers into fried rice!  It was delicious – better than the casserole, which I really enjoy on its own – and only took about 15 minutes.

photo of fried rice made from mixed grain veggie casserole

Disclaimer: This post contains affiliate links.  See my Disclosure Policy for more information.


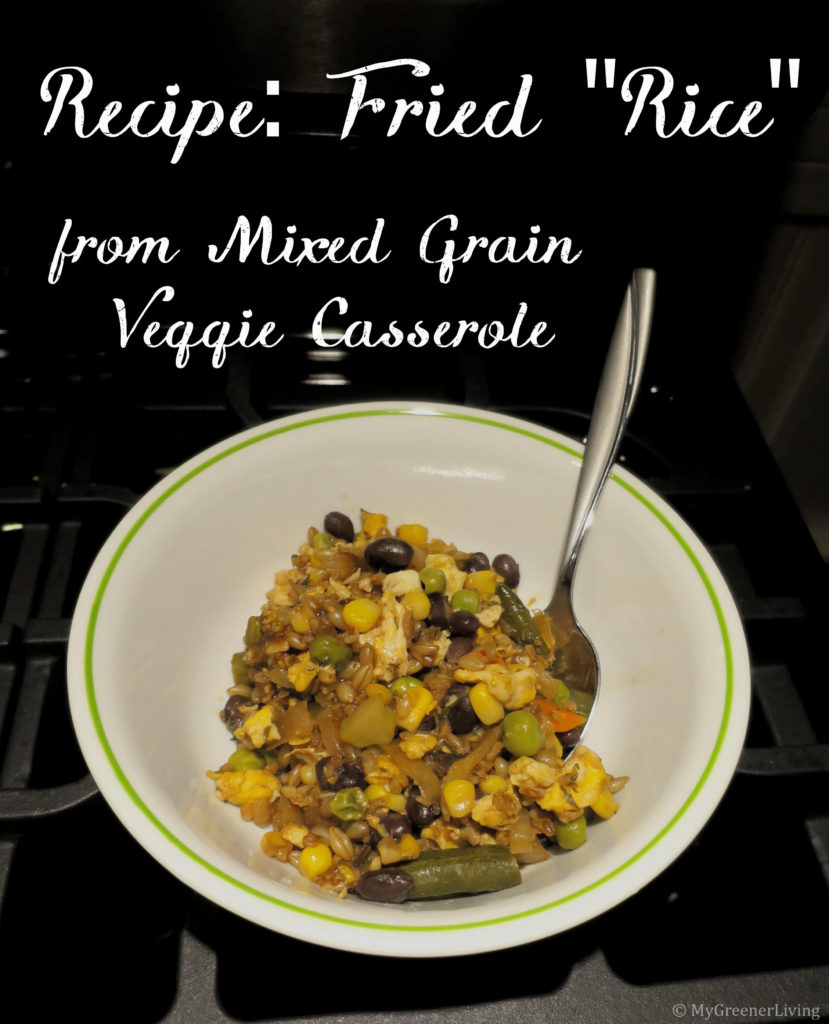
The Recipe – Mixed Grain and Veggie Casserole, “Fried Rice” Style

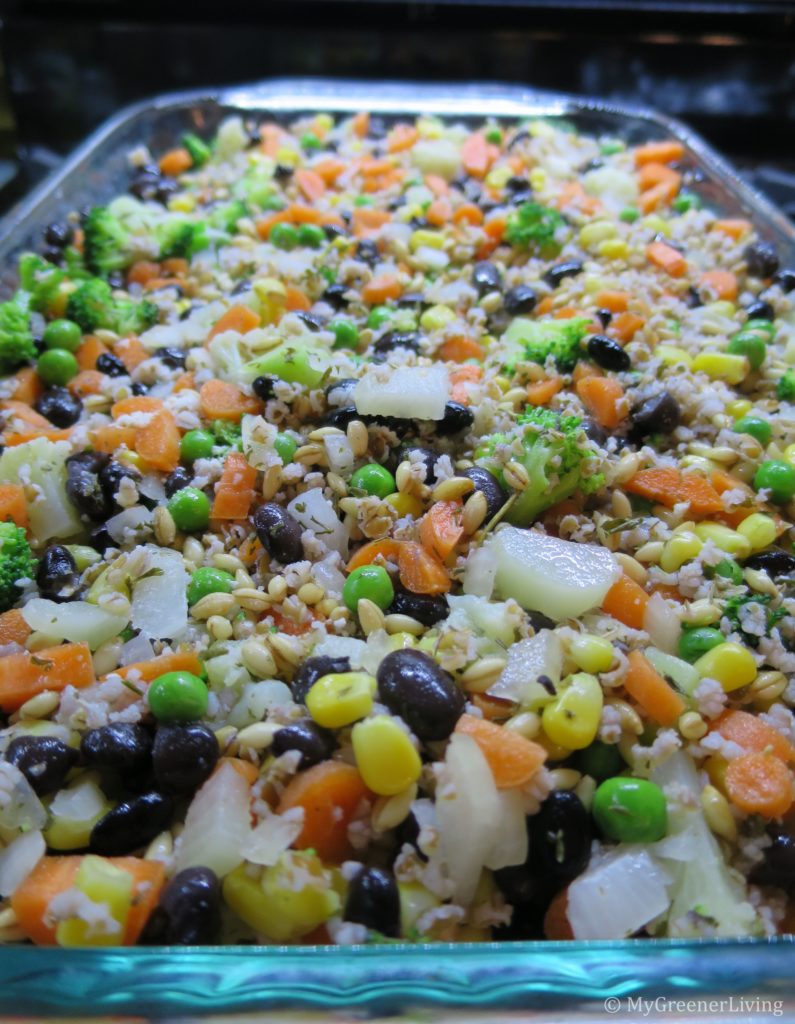
This recipe has (leftover) mixed grain and veggie casserole as an ingredient.  Note:  it actually contains no rice, unless I opt to use rice in my casserole instead of the barley or bulgar.  Head over to this post to get the casserole recipe!  Depending on if I am chopping fresh veggies or using frozen, this casserole takes me 20-40 minutes to prep, and bakes for an hour.  If I wanted to make the casserole to make the “fried rice”, I would allow about 2 hours (30 minute casserole prep, 1 hour bake, 15 minutes cool, and 15 minutes to mix up the “fried rice”).

mixed grain and veggie casserole
this recipe uses prepared mixed grain veggie casserole as a base

This “fried rice” recipe makes 2 servings, but can easily be scaled to re-purpose more or less of the leftover casserole.

When I make this starting with the casserole leftovers in the fridge, it takes only about 15 minutes to whip up dinner!  

Ingredients

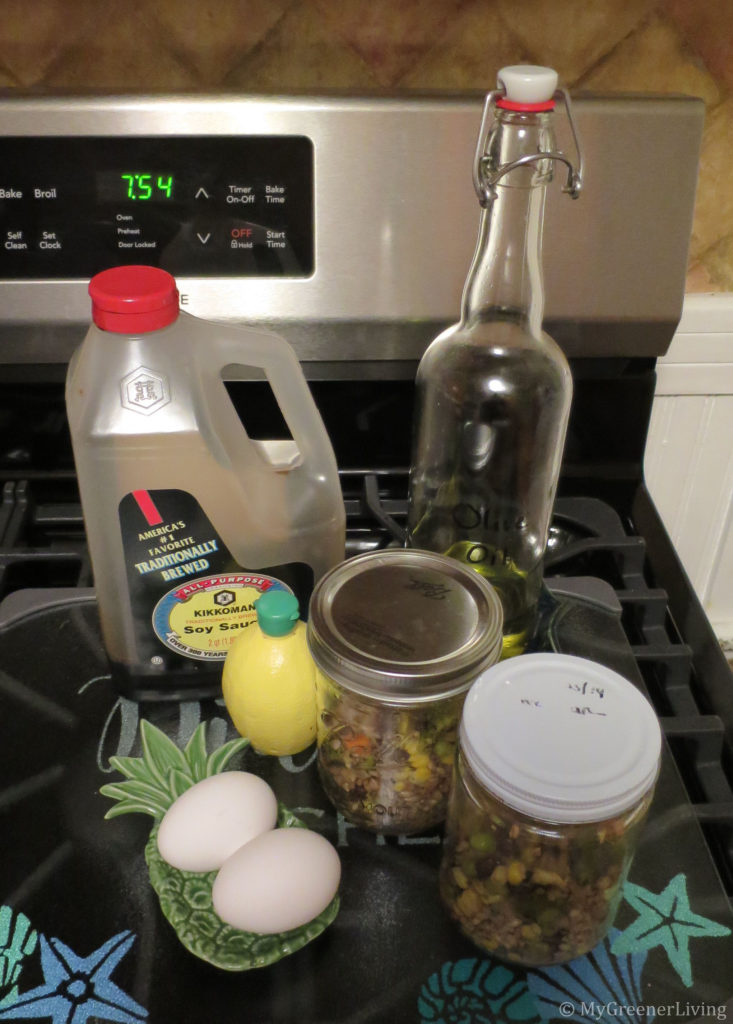
  • about 1/5 of the mixed grain and veggie casserole, prepared.
  • 1-2 Tablespoons oil (I used olive, but canola, vegetable, avocado, etc. would work)
  • 2 eggs (omit for a vegan version)
  • 1-2 Tablespoons soy sauce (I use light soy sauce, or dilute regular soy sauce in a 1:1 ratio with water, otherwise it’s too salty for me)
  • garlic salt or other spices, to taste (I used just a pinch)
ingredients used to make grain and veggie fried "rice"

Instructions

  1. Pour oil into a medium skillet (I love my Farberware skillets!).  Heat over medium heat.  Crack the eggs into the pan and scramble.  Cook until eggs reach the desired consistency.
  2. Pour the leftover mixed grain and veggie casserole into the pan with the eggs.  To the fry pan, add spices, if using, and about 1 Tablespoon soy sauce or diluted soy sauce mixture. 
  3. Stir over medium heat until ingredients are heated through.  Add more soy sauce and spices to taste.
  4. Transfer to 2 plates or bowls, and enjoy! 
mixed grain veggie fried rice

Recipe Cost per Serving

  • Mixed grain and veggie casserole: $0.56/serving.  The full ingredient breakdown is on that recipe page.
  • 2 Tbsp Olive oil: $9.99 for 1.5 Liters. 15 mL= 1 Tbsp. $9.99x(30mL/1500mL)=$0.20 per batch, $0.10 per serving
  • 2 Eggs: $1.99/dozen x 2 = $0.332 per batch, $0.166 per serving
  • 1 Tbsp Soy Sauce: $5.49 for 64 oz.  1 Tbsp=0.5 oz. $5.49x(0.5oz/64 oz)=$0.043 per batch, $0.021 per serving
  • Garlic Salt: $0.99 for 8 oz (227 gram, 43.5 tsp). $0.99x(0.125tsp/43.5tsp)=$0.003 per batch, $0.001 per serving

Total cost per serving: $0.85

While the added ingredients increase the cost of this meal, it’s still a nutritious and delicious dish for less than $1 per serving!  


I think the idea of re-purposing leftovers to make a slightly different meal is a fantastic idea!  Do you have favorite recipes for re-purposing leftovers?  Please share with us in the comments below! 

Reusable Gift Wrapping

Growing up, my family always reused gift bags until they looked too worn or fell apart.  I think it was part frugal, and part “why throw away something perfectly good and useful?”  I have carried that into my adult life, and tend to avoid wrapping paper due to the single-use aspect.  A couple years ago, I decided to up my game and make longer-lasting reusable gift packaging.  

reusable fabric gift bag and chalk tag

Disclaimer: This post contains affiliate links.  See my Disclosure Policy for more information.


Reusable Gifts Bags

I decided to tackle Christmas wrapping first.  I found a large Christmas tablecloth at a thrift store (Savers – my favorite thrift store in my area) for $5.  I picked up some ribbon on clearance from Michael’s and Christmastree Shops.  I was ready to go!

Sewing designs for reusable gift bags

tow reusable fabric gift bags
different string designs make the finished product look more of less frilly

I first used a draw-string backpack for inspiration on how to design my gift bag.  After making a couple, I realized I would improve my design by using used a draw-string jewelry bag for inspiration, instead.  The difference is that the backpack has just one pocket running around the top of the opening, through which the string or ribbon is run.  The jewelry bags have two pockets, one over the other, with the ribbon running through the bottom one.  This allows the top “pocket” to fold and ruffle and look more pretty and gift-y!  

tops of two different drawstring reusable bags
the bag at the top has the double pocket style, and the bag at the bottom has the single drawstring pocket style

Simple designs

I’ve made some very simple reusable gift bags that were just a rectangle of fabric, folded in half and sewed, leaving one side open.  Rather than having an integrated draw-string, I’ve just tied a ribbon around the top.  This shape bag works well for more fat, envelope-shaped gifts, but doesn’t work as well for thicker rectangular or round gifts.

reusable fabric gift bag and tag

Cylindrical fabric reusable gift bag

My favorite style reusable gift bag has a more cylinder shape.  I have found this to be most versatile, since it can incorporate a wide range of gift shapes.  Even rectangular boxes fit well.  To make these, I cut out a circle of fabric (I trace a bowl or plate, I couldn’t draw a circle to save my life! But really, the shape doesn’t matter.  Ovals work fine.)  I then cut a rectangle of fabric with one length the same as the circumference of the circle. 

cylindrical fabric reusable gift bag

What About No-Sew Designs?

I have sewed all of my reusable gift bags, because I’ve been sewing since I was a kid and I find basic sewing to be easy enough.  The no-sew alternative that I thought of was fabric gluing instead of sewing.  Theoretically any design could be made this way, and as long as the glue was allowed to dry thoroughly, it should hold up pretty well.  

I personally would try to flat/rectangle designs first, as they do not require holding up more complex shapes.  It’s just folding fabric, gluing, and letting dry.  

There’s also an even simpler reusable gift bag option that uses no sewing, no glue, just fabric and ribbon or string to tie.  Just cut out a somewhat square or circle-type shape (pinking shears are advisable as they will prevent fraying, but are not essential).  Place the gift in the middle, gather up the fabric, and tie the fabric above the gift. Just like wrapping a gift basket!

gift wrapped by bundling fabric and tying with a ribbon, like a gift basket

For a more smooth, finished look more similar to using paper to wrap gifts, the Japanese furoshiki cloth wrapping style looks great!  I have not spent much time playing around with this wrapping style, so I will point you over to this Wellness Mama post for some great instructions.

Cost to Make Fabric Reusable Gift Bags

My large tablecloth provided enough fabric for me to make about 10 reusable gift bags of varying sizes.  Considering the best prices I have found for paper gift bags is $0.50-$1.00, I think I did pretty well for myself!  I did put in more time than purchasing gift bags, but I enjoyed it, and I enjoy knowing that these will last for years and are keeping waste out of landfills. 

Reusable Gift Tags

I also decided to make some reusable gift tags.  I was inspired by these little flat wood pieces with festive designs on one side.  I found them on clearance at Michael’s for $0.10 right after Christmas a couple years ago.

wood piece with snowflake design

I drilled a small hole in the top for a string to use for attaching to gifts.  Then I mixed up some chalk paint using black acrylic paint and some dry spackle in a ratio of about 10 parts paint to 1 part spackle and painted it on the back of the wood pieces.  I painted 3 layers, allowing to fully dry between coats.  Then I tied a little cotton string through the hole.  I use chalk to label the tags, then use the drawstring bag ribbons to attach the tag to the gift wrap. 

Note: I used spackle that I have had for ages, and I cannot find that type anymore.  From my research, it seems unsanded grout also works pretty much the same.  Also, both acrylic and latex paints work. 

gift tag with DIY chalkboard backing

This year, I have been able to wrap all of my gifts in these reusable gift bags or other gift boxes or reusable bags that I have acquired over the years.  I plan to make more bags in different fabrics, and more tags, to make sure I always have enough!  I found another $5 tablecloth at Savers and am just waiting until I have some time to transform that fabric into more reusable gift bags.

christmas tree with gifts wrapped in fabric reusable gift bags with reusable chalk tags