You all know that I try to avoid synthetic chemicals. What you might not know is that I am also a science nerd. And while I dislike clutter, I love useful, functional gadgets. And this is how I found a simple and inexpensive method for cleaning without chemicals, using a UV light wand.
Note: I am not a doctor or a scientist, and I cannot make claims about the effectiveness of this product. I am only reporting my beliefs, based on my research and personal use.
Disclaimer: This post contains affiliate links. See my Disclosure Policy for more information.
I have this really bad habit of perusing Kickstarter when I am bored. It’s fun to see the new projects different people are working on, and I come across some pretty neat products.
UV Light for cleaning without chemicals
One day I was perusing Kickstarter, and came across a product that claimed to kill some viruses and bacteria using a specific wavelength of light. Ever curious, I began researching this claim. And soon came to believe that it is true. According to several studies, (Study 1, Study 2, Study 3, Study 4, Study 5, Study 6, and many more studies) certain wavelengths on the light spectrum can be used for cleaning without chemicals! How cool is this?! No synthetic chemicals, no natural chemicals, just whatever goes into making a light and its holder. Which, I realize, does have chemicals and waste associated with it. But, assuming they’re like other flashlights and electronics that I use, these devices can last years, with only the one time waste produced. I’ll take that over exposing my skin and lungs to synthetic chemicals every time I need to clean!
Caution: The wavelength of the UV light in these products can burn skin and eyes. NEVER look at the UV light (also avoid looking at the reflection of the light) and keep bare skin away. I wear long pants and socks when using the UV light on low surfaces. NEVER shine the light at any people or animals. Heed all cautions on product packaging.
UV light wand
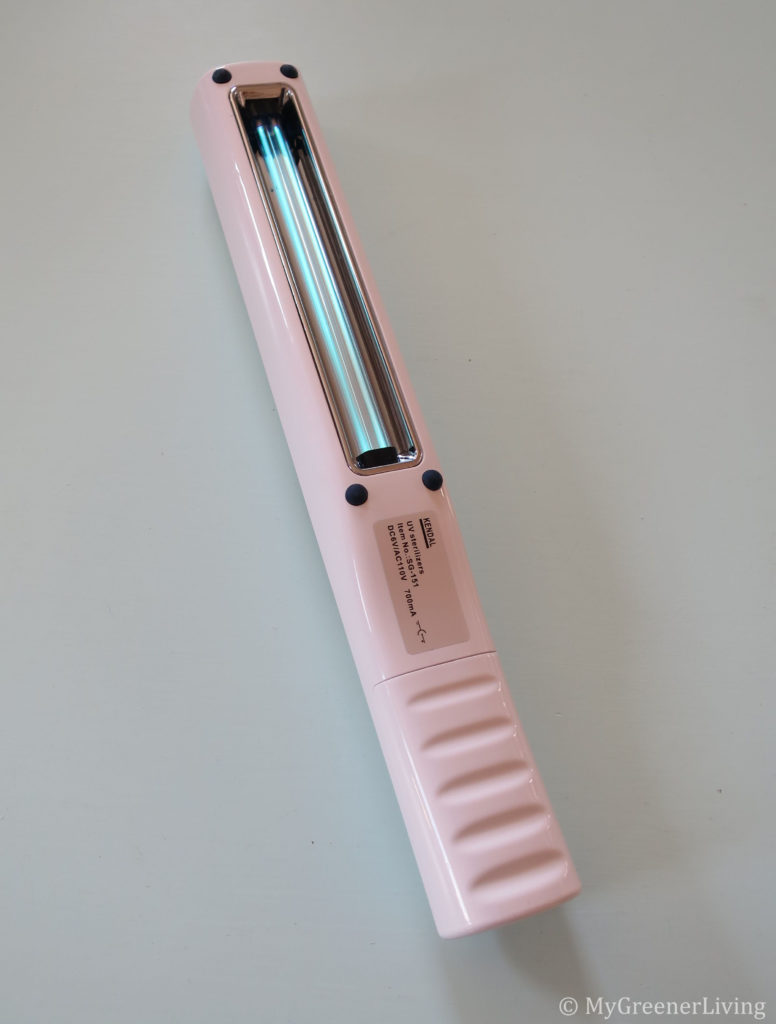
UV light wand
After learning this awesome new fact, I started researching on Amazon. How much do these products cost? And do users feel that they work? I came across several UV “wands” and really liked this one. Two things really sold me on the UV wands, and one thing sold me on the Kendal UV wand in particular. I was very excited to try a new product for cleaning without chemicals.
Note: the original product that introduced me to cleaning with UV light is not yet available, so I have not tried it and cannot review it at this time.
A microbiologist’s test
As I read through the reviews, I was looking for facts. Which can be tough for a common person in relation to cleaning. No matter how thoroughly I feel I have cleaned, I don’t really have a way to know if I have succeeded. So [the nerd in me] was so excited when I found a review from a microbiologist. (Yes, I know, I have no proof that this person is a microbiologist. But I asked myself, what would this person have to gain by lying about this? — nothing that I could see. And is there evidence to back up the claim? — yes: photos of “a common skin bacteria, Staphylococcus epidermidis, on … agar plates.” This seems real enough for me.)
Anyway, this microbiologist took samples of a common skin bacteria, put them in containers, held this UV wand over the container for either 0, 5, 10, 30, or 60 seconds, and provided photos of the containers with bacteria visible.
The results showed a significant decrease in bacteria after 5 seconds (proving to me that this works!). The photos showed not much more decrease in bacterial with more time under the light. Which told me something else useful – holding the light over the surface which I am trying to sanitize for about 5 seconds is all that is needed. If you want to see the photos, scroll down to the reviews and click on the photo for the Kendal UV wand.
UV light wand – with bulb ON
The bathroom test
This one is a little gross, but also to me proved effectiveness. Have you ever been in a bathroom that had an unpleasant urine smell? Worse yet, was it your own bathroom? And despite scrubbing every surface with various cleaners, you can’t get the smell to go away? This UV wand may be the answer to your prayers. Several reviewers commented that the UV light made that awful smell go away. This is honestly what sold me. For over a year, I had this problem in my guest bathroom. I scrubbed and scrubbed and still, especially on hot days, it stunk. I think urine got in the grout around the tiles, but I was not looking forward to re-grouting my floor.
My success
So I bought this UV wand. And in a slow, sweeping motion, ensuring the light stayed over each spot at least 5 seconds, I “sanitized” my entire guest bathroom toilet, floor, sink, and door knob (only took 5-10 minutes, it is a small half bath). The next morning, I went in the bathroom, and no stink! Yay!!
I was so excited about this find that I told several of my friends. A couple months later, one of those friends told me that her toddler missed the toilet and now the bathroom smells unbearable despite intense cleaning. She borrowed my UV wand and reported that it worked like magic!
I have noticed in my bathroom that, after a month or two, the smell starts to come back. This further supports my thought that the urine or whatever is causing the smell (some bacteria?) is in the grout around the tiles. I guess that the light kills whatever is on the surface, but that some bacteria is deeper in the grout and continues to grow, reaching the surface and starting to stink again after several weeks. But, all I need to do is slowly run the light over the likely stink-producing surfaces once a month or so to keep the bad smell away.
using the UV light wand to clean the faucet
Additional note on my selection of the Kendal UV Wand
There were two reasons, unrelated to the effectiveness of the UV wand, why I selected the Kendal UV wand. One reason was the price – I paid $19.99 (April 2017). The other comparable wands at the time were around $70.
The second reason was a safety feature – or lack thereof. Many of these UV wands have a safety feature where the light automatically turns off when the bulb is turned upwards. This is so you cannot accidentally shine the light in your eyes. But, how can I use this the clean the underside of a door knob? Or the outside underside of a toilet bowl? The Kendal UV wand does not have this safety feature, which makes cleaning with this wand easier. But, be careful not to shine the light in your (or anyone’s) face!
Purchasing note: It appears that the Kendal UV wand is no longer readily available as of October 2017. This wand appears identical with the exception that the label sticker contains multiple languages.
Have you used any alternative products for cleaning without chemicals? Please share in the comments below!
“(Holds up a soda can) Hey, you know how I’m, like, always trying to save the planet? (Tosses the can in the recycle bin and looks at the spaceship) Here’s my chance.” –David Levinson, Independence day
I’m just like David, always trying to save the planet. And now I will tell you about a really easy way for you to help save the planet, too: Composting! How does composting help the planet? I am glad you asked. When food waste ends up in a landfill, it rots and releases methane gas which contributes to climate change. Food waste in a landfill cannot biodegrade, and the nutrients don’t make it back into the soil. Composting reduces the the methane gas released in landfills, keeps some “garbage” out of landfills, and lets our beautiful world keep some of its valuable nutrients! Wins all around!
Disclaimer: This post contains affiliate links. See my Disclosure Policy for more information.
You can save food “waste” from the landfill, and from compost
Ok, before I get into the details about composting, I want you to know that there are ways to reduce your food waste, to reduce what needs to go into landfills or compost. According to the EPA, about 1/3 of food produced in the US is not eaten. The “EPA estimates that more food reaches landfills and incinerators than any other single material in our everyday trash.” This is a serious problem. Why is it happening?
In the US, and probably elsewhere in the world, we have this expectation that all the food we eat should look perfect. Well guess what? Food does not have to look perfect to be safe, healthy, and delicious!
I am NOT advocating for you to eat rotten or moldy food. But a bruise on an apple, crack in the skin of a tomato, or brown color of avocado after the cut flesh has been exposed to the air and oxidizes are not going to kill you. The food is still good: safe and nutritious! My first recommendation is to embrace eating “ugly food” (check out @UglyFruitAndVeg on Twitter). To help reduce food waste, consider meal planning: only buying what you need to avoid letting food rot in your house, and don’t dispose of food until it has really gone bad!
Even if you try hard to reduce your food waste, there will still be some: the skin of a spaghetti squash, apple cores (though some people eat those…I am not there yet!) zucchini stems, kale stems, and egg shells all end up in my waste pile. These items can all be kept out of landfills – they’re perfect candidates for composting!
What exactly is composting?
Composting is a way to accelerate the natural process of decomposition of organic matter. By combining the proper ratio of organic matter, specific organisms, heat, or a combination of these things, decomposition is accelerated. This results in the creation of nutrient-rich soil-like compost, which can be mixed with soil of potted plants, vegetable gardens, flower gardens, and more.
The following comes from the Institute for Local Self-Reliance (www.ilsr.org), a national nonprofit organization working to strengthen local economies, and redirect waste into local recycling, composting, and reuse industries. It is reprinted here with permission.
Composting at home
Anyone can compost at home! If you have some outdoor space, a bin, pile or tumbler is a simple way to start composting. For city-dwellers, there are small indoor options, too.
Outdoor composting
The key to healthy backyard compost is the ratio of 1 part “green” to 3 parts “brown” matter. If you maintain this ratio and avoid certain items, your compost will NOT smell, and it will break down well.
It’s pretty simple: “green” matter is essentially moist organic matter, and brown matter is dried organic matter. For the most part, both green and brown matter are plant-based, though there are some exceptions. Green matter includes fruit and vegetable stems, peels, and rotten pieces; plant trimmings; egg shells (crush them before adding to your compost); tea bags and coffee grounds. Brown matter includes dried leaves, shredded newspaper, shredded cardboard, twigs, paper towels, and paper napkins (if not soiled with oily substances).
Avoid things like dairy, meats, and fats, as these items cannot break down in a backyard compost, and will attract pests.
Compost Pile
The simplest and least expensive way to compost is with a compost pile. at the most basic level, you can just dump your compost in a pile. To make it a little more contained, you can use chicken wire and some stakes to encircle a space for your compost pile. My awesome friend E shared a picture of her backyard compost pile:
E’s compost pile
Since a compost pile is uncovered, it works well to keep the brown matter on top. E’s family keeps the compost pile in a forested area of the yard with plenty of leaves around. After tossing green matter into the pile, they put some dead leaves on top to cover. This keeps the compost pile balanced near the efficient ratio of 1:3 green to brown matter, and keeps rotting smells away.
Compost bin
Another option for backyard composting, which works well if you have more limited space or want to keep the compost more contained, is a compost bin. Compost bins resemble a 50 gallon trash barrel. They are relatively inexpensive (around $100 online), and completely hide the compost. I was able to pick one up from Rhode Island Resource Recovery. I believe the state or town subsidizes part of the cost, and that I only paid about $20 for my compost bin. Check your local refuse department, or look for one at a hardware store.
my compost bin
Since I don’t have dried yard waste readily available to use as brown matter, I shred or rip up newspapers, and add this to my compost bin every so often.
To keep the compost decomposing properly, you need to “turn” your compost pile periodically. I do this a couple times a year, more often in the summer and usually do not in the winter. You can use a shovel or hoe, but I have found the Compost Crank to be the easiest way to do this.
Pro tip
If you want to ensure that your compost stays contained within your chicken-wired space or bin, block the bottom with chicken wire. Lay down chicken wire on the ground where you want your compost bin or pile, then put up the chicken wire fence or compost bin over this.
Why is chicken wire under your compost necessary?
Well, it is not necessary, but recommended. My friends, even if you keep the meat and dairy out of your compost to keep the raccoons and rats away, there are other pesky critters who think that your compost pile is their own private feeding ground!
I had my compost bin for about 1 year without any issues. Then one day, I noticed that much of the contents of my compost bin were piled up NEXT to the bin. It was early summer and getting warmer, and I knew decomposition would be accelerating. I wanted the compost contained. I shoveled everything back in the bin. The next day…the same thing happened. A cute little chipmunk was taking over my compost bin! I don’t mind him snacking on my food scraps, but I wanted the contents staying IN the bin. So I removed the bin, shoveled the compost onto a tarp, laid down chicken wire, put the bin back, and shoveled the compost back into the bin. Save yourself the trouble and just put down chicken wire before you put any compost in the bin!
these cute critters like snacking from your compost pile
Tumbling compost bin
If you want to get a little fancier, there are tumbling compost containers. They resemble a barrel turned on its side, and are suspended in a frame that allows them to rotate, tumbling and mixing the contents. This makes the mixing process much easier.
Several of the tumbling compost bins on the market today have 2 separate chambers. I highly recommend getting one of those if you want a tumbling composter, because this allows the ability to continuously add fresh material while still being able to harvest the broken down compost for gardening. Once one side starts to get full, or whenever you have a good ratio (remember 1 part green to 3 parts brown), you can stop using that side, and in a couple of weeks to months (temperature and content size dependent) you’ll have compost that you can mix with your garden soil. But, all this time, you can be using the other side for your newly generated compostable waste.
While I don’t own one of these (yet), this small tumbling compost bin looks pretty good, and at a reasonable price (under $100, as of October 2017). Check the size of the bin before you buy to make sure it’ll work for you! My bin is about 80 gallons, whereas this tumbling one is only 37 gallons.
Indoor composting
Composting indoors typically uses worms, and is called vermicomposting. With a vermicomposting, you have a setup in which redworms (Eisenia foetida, also called the red wiggler), consume and digest kitchen scraps, excreting a nutrient-rich compost material. The process is fairly quick, can be done in a smaller volume space than a typical outdoor composter, but you need to use more care to as to keep the worms alive. For example, you need to keep the air temperature within a certain range (so in some regions, you may not be able to keep your worm composter in the basement, garage, or outside) and you have to use care not to over feed your worms, or feed them food that they cannot digest.
I think commercial or industrial composting is awesome, and I hope that soon it will become more widespread. Industrial or commercial composting is large scale composting, and can handle a wider range of organic materials than backyard or vermicomposters. Diary, meat, bones, non-recyclable paper, and more, plus everything that can go in backyard compost can go into industrial compost. This is because industrial compost facilities carefully monitor the chemical makeup of compost (think of it as a more sophisticated version of the backyard composter maintaining the 1:3 ratio of green to brown matter), work with large volumes so they can generate more heat, and have equipment to grind organic material into smaller pieces to speed the decomposition process.
Commercial compost facilities can sell the compost to farms, municipalities, and individuals, generating income to fund the process. With landfill space filling up fast, some cities have adopted a mandatory composting system with industrial compost facilities. San Francisco, Los Angeles, and Minneapolis require residents to put all food waste in special bins to go to compost facilities. This solves their immediate concern of overfilled landfills, and helps the planet. Other cities are investigating commercial composting, but this transition is slow.
The negatives to industrial composting
There are some potential downsides to commercial compost. While only certain materials are accepted (no garbage waste like plastics and metals), there are invisible hazards that can sneak into commercial compost: pesticides and other synthetic chemicals. A large amount of commercial compost raw material comes from grass clippings, which can be laden with pesticides. These pesticides stay on the material as it is broken down, and therefore remain in the compost material. If this compost is then mixed with soil to grow crops, the pesticides can contaminate those crops. Not a good thing for people who live organic, avoiding pesticides and synthetic chemicals! And this can also negatively impact some crop growth.
I still believe that there are many benefits to industrial composting, but recognize that we do have a long way to go to make this a truly great thing.
What do you do with compost before you bring it to the bin, pile, etc.?
There are several ways to store food scraps before putting in your compost bin, pile, or other vessel. I personally keep my compost in a cute bin on my counter where it is easy to access, but keeps the stink away. This works well for me because I cook daily, generating at least small amounts of compostable waste frequently. I love this countertop compost pail. It has a carbon filter in the lid which prevents any smell from getting out of the bin. It’s convenient to store food scraps so I don’t have to run outside to my compost bin every time I cut apples or trim kale. And it looks nice enough- it’s a pretty way to store my ugly food trimmings.
You can also store your food trimmings in a sealing container in your refrigerator or freezer. This will keep the smell contained and decelerate rotting until you can dump it into your compost container.
Alternately, you can bring compostable materials directly to the compost container after generating the waste.
Benefits (to you and the planet)
There are so many benefits to composting! One of the huge benefits is to the environment. When you compost, you are allowing the nutrients from organic materials to be released back into the Earth. These nutrients are used to build new organic matter, fueling the growth of trees, grass, the plants in your garden. Additionally, it is keeping these food scraps out of landfills. Nothing in landfills breaks down. It doesn’t have the right combination of nutrients, organic matter, and good microbes to break down the food. So we’re filling our landfills, and robbing the Earth of its precious nutrients.
Additionally, composting can save you money. The EPA estimates that about 22% of the waste that ends up in landfills is food waste. No matter what the setup is, you pay to dispose of waste in the landfill. It might just be the plastic garbage bags that you purchase to line your garbage bin, it may be town trash bags, or you may pay by the weight of garbage you bring to the landfill. If you can reduce even just a portion of that 22%, you’re saving yourself money!
My town charges me to participate in their disposal program, but also to purchase special town garbage bags, into which all of my landfill waste must go. I used to fill a 30 gallon trash bag (which cost me $2) every two-three weeks or so. Now that I compost and am more conscious of minimizing waste as I live my life, I rarely fill a 13-gallon trash bag in a month. This saves me money, saves landfill space, and gives me nutritious compost to help feed the plants in my garden!
Do you compost? Do you have any tips to share? Please post in the comments below!