
Disclaimer: This post contains affiliate links, which means I may receive compensation if you make a purchase through these links. There is no cost to you. See my Disclosure Policy for more information.
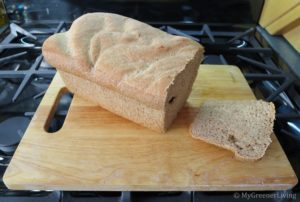
This soaked whole wheat bread is so light and delicious! I love it toasted with a little butter or peanut butter. Delicious and nutritious breakfast or snack! (bonus: wheat bread + peanut butter = complete protein!)

Soaked Whole Wheat Bread
Ingredients
- 8 1/2 c. whole wheat flour 1020 grams
- 1/4 cup vital wheat gluten added after soaking
- 2.5 c. plus 1/4 cup filtered water
- 2.5 tbsp. acidic medium apple cider vinegar, whey, yogurt, kefir, lemon - I prefer apple cider vinegar
- 2 tsp. salt
- 2 heaping tsp. instant yeast
- 2 tbsp. sugar
Instructions
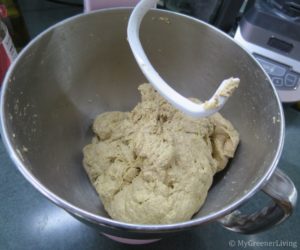
- 1. Mix flour, 2.5 cups water, & acidic medium until well incorporated. I use my KitchenAid Stand Mixer. Start with 2.5 cups water and slowly (1 teaspoon or tablespoon at a time) add more until all flour is moistened. The dough should be VERY thick. Cover with greased plastic wrap or a silicone bowl cover, if you're lucky enough to have one, and sit at room temperature for 10-24 hours (longer time results in more sour taste - I prefer 10-12 hours)
- 2. After 10-24 hours, warm dough for 10 minutes by placing in a warm oven. I turn my oven onto its lowest temperature, 170 degrees Fahrenheit, then turn off before putting the dough in.
- 3. Heat 1/4 cup water to about 110 degrees Fahrenheit (about 18-20 seconds in my 900 watt microwave, in a 1 cup mason jar). Mix warm water, yeast & sweetener. Allow yeast to feed on the sugar about 5-10 minutes. Take the dough out of the oven. Add yeast mixture to dough. Add wheat gluten. Mix well by kneading with hands or electric mixer. Cover with greased plastic wrap or a silicone bowl cover, and let rise in a warm oven (again I turn on to lowest setting, the turn off) for 45-60 minutes or until doubled.
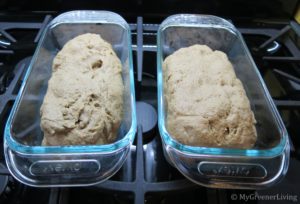
- 4. After 45-60 minutes, sprinkle 2 tsp. of salt & 1/2 crushed Vitamin C tablet and knead well with hands or electric stand mixer until the dough is tough and the gluten is well-formed. If needed, add more flour slowly. Butter two loaf pans. Divide dough in half and form each into a cylinder. Place each loaf in its pan. Alternately, you can roll out the dough then roll it up like a jelly roll. This will yield a smoother, more uniform loaf. I choose to roughly shape with my hands because it is much faster and less messy for me.
- 5. Place the loaf pans with dough in a warm oven & let rise, uncovered, another 45-60 minutes. After 45-60 minutes, carefully remove risen bread out of oven and preheat the oven to 350 degrees Fahrenheit.
- 6. Bake the bread at 350 degrees Fahrenheit for 25-30 minutes or until internal temperature reaches 180 degrees. (I use a standard meat thermometer like this Taylor Precision Products one to measure - it has a nifty marker to make it easy to see when your food has reached the desired temperature! I insert after about 20 minutes. If you insert before beginning baking the dough may fall.) Remove bread from oven and let cool in pans for 5 minutes, then remove and let cool for 10-25 minutes before cutting. If you have an electric knife, I recommend that to cut - you'll get nice smooth cuts and it'll only take a few minutes to slice!
Here’s my version of the recipe:
Hands-on prep time: about 25 minutes
Cook time: about 25 minutes
Total time including soaking and rising: 13-27 hours
Ingredients
8 1/2 c. whole wheat flour (1020 grams – I always weigh my flour. I love my digital kitchen scale)
¼ cup vital wheat gluten, added after soaking
2.5 c. plus 1/4 cup filtered water
2.5 tbsp. acidic medium (apple cider vinegar, whey, yogurt, kefir, lemon – I prefer apple cider vinegar)
2 tsp. salt
2 heaping tsp. instant yeast
2 tbsp. sugar
Instructions
1. Mix flour, 2.5 cups water, & acidic medium until well incorporated. I use my KitchenAid Stand Mixer. Start with 2.5 cups water and slowly (1 teaspoon or tablespoon at a time) add more until all flour is moistened. The dough should be VERY thick. Cover with greased plastic wrap or a silicone bowl cover, if you’re lucky enough to have one, and sit at room temperature for 10-24 hours (longer time results in more sour taste – I prefer 10-12 hours)

2. After 10-24 hours, warm dough for 10 minutes by placing in a warm oven. I turn my oven onto its lowest temperature, 170 degrees Fahrenheit, then turn off before putting the dough in.
3. Heat 1/4 cup water to about 110 degrees Fahrenheit (about 18-20 seconds in my 900 watt microwave, in a 1 cup mason jar). Mix warm water, yeast & sweetener. Allow yeast to feed on the sugar about 5-10 minutes. Take the dough out of the oven. Add yeast mixture to dough. Add wheat gluten. Mix well by kneading with hands or electric mixer. Cover with greased plastic wrap or a silicone bowl cover and let rise in a warm oven (again I turn on to lowest setting, the turn off) for 45-60 minutes or until doubled.

4. After 45-60 minutes, sprinkle 2 tsp. of salt & 1/2 crushed Vitamin C tablet and knead well with hands or electric stand mixer until the dough is tough and the gluten is well-formed. If needed, add more flour slowly. Butter two loaf pans. Divide dough in half and form each into a cylinder. Place each loaf in its pan. Alternately, you can roll out the dough then roll it up like a jelly roll. This will yield a smoother, more uniform loaf. I choose to roughly shape with my hands because it is much faster and less messy for me.
5. Place the loaf pans with dough in a warm oven & let rise, uncovered, another 45-60 minutes. After 45-60 minutes, carefully remove risen bread out of oven and preheat the oven to 350 degrees Fahrenheit.
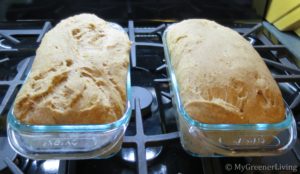
6. Bake the bread at 350 degrees Fahrenheit for 25-30 minutes or until internal temperature reaches 180 degrees. (I use a standard meat thermometer like this Taylor Precision Products one to measure – it has a nifty marker to make it easy to see when your food has reached the desired temperature! I insert after about 20 minutes. If you insert before beginning baking the dough may fall.) Remove bread from oven and let cool in pans for 5 minutes, then remove and let cool for 10-25 minutes before cutting. If you have an electric knife, I recommend that to cut – you’ll get nice smooth cuts and it’ll only take a few minutes to slice!

One batch yields 2 loaves, and I get 14 slices per loaf, including ends. The whole wheat and multi-grain bread that I used to buy was 16 slices per loaf, including ends.
One loaf of store bought bread is approximately $2.99 on sale, or $2.99/16=$0.19 per slice.
My bread cost breakdown
1-5 pound bag of whole wheat flour, Stop and Shop brand, $3.49. This recipe uses 8.5 cups flour, or 1020/2270=0.4493=45% of the bag. $3.49×0.45=$1.57.
1-22 ounce bag of Bob’s Red Mill Vital Wheat Gluten, $10.93 on Amazon (I can get it less expensive at a local chain, Ocean State Job Lot, but I do not recall the price so I’ll use the readily available Amazon price). This recipe uses 1/4 cup, or 30/623.69=0.048=5% of the bag. $10.93×0.05=$0.55.
Water – I have an in-line filter for my tap water, which is very inexpensive. For the purposes of this price comparison, water is free.
Apple cider vinegar – I use Vermont Village Organic Apple Cider Vinegar from BJ’s WHolesale Club. It costs $8.99 for two-32 ounce (946mL) bottles. 2.5 Tbsp is 36.9675/(946×2)=0.0195=2% of the bottles. $8.99×0.02=$0.18 (Also available on Amazon)
Salt – I use iodized table salt, $0.99 for 26 ounces at a grocery store, Target, Walmart, etc. This recipe uses 2.846/737=0.0039=.39% of a carton. $0.99x.0039=$0.0038->round up to $0.01
Instant yeast – I use Fleischmann’s Bread Machine Yeast, $7.99 for a 4 oz/113 gram jar at my local Stop and Shop. This recipe uses 2 heaping teaspoons (about 2.25 teaspoons), or 7 grams. 7/113=0.0619=6.2% of a jar. $7.99x.062=$0.50. (Saf yeast available on Amazon has worked well for me too)
Sugar – 10 lb bag for $4.99 at BJ’s. I always buy with a coupon, so $3.99 for 10 pounds. 2 Tbsp=24 grams; 24/4535.92=0.00529=0.53% of a 10 lb bag. $3.99×0.0053=$0.02.
Total cost for 2 loaves of home made bread: $1.57+$0.55+$0.18+$0.01+$0.50+$0.02=$2.83. Two loaves of my bread cost less than one regular loaf on sale. If I buy discounted/nearing expiration bread at the grocery store, I can probably get it for $1.00-$1.50, making it possible to purchase bread for lower cost than making it. However, soaked bread is more expensive, not to mention hard to find. I plan to keep making my own bread whenever I have time. I enjoy baking, enjoy the flavor, and enjoy minor cost savings over store bought bread.
I hope you enjoy this recipe! Happy baking!
