Disclaimer: This post contains affiliate links, which means I may receive compensation if you make a purchase through these links. There is no cost to you. See my Disclosure Policy for more information.
I wrote a post about cautions of homemade sunscreens which I recommend reading before deciding whether or not it may be something you want to try.
Last year I wrote about natural sun screen, Raw Elements. This was the first sunscreen that I found that did not cause my skin to break out in a rash or itch. I was very happy to find a sunscreen that I could use, but wanted to find a way to make my own homemade natural sunscreen to save some money.
Now, in time for your winter warm weather vacation, here’s my homemade natural sunscreen recipe!
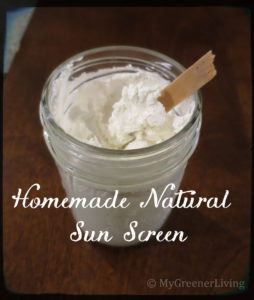
I tried several small batches of various recipes before selling on a water-resistant recipe. Note that like the Raw Elements sunscreen, this is thick and oily, and like all sunscreen I’ve ever used, if it gets in your eyes it will burn.
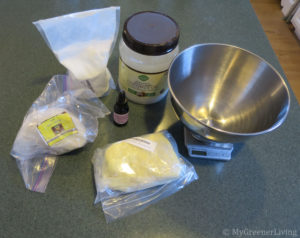
Ingredients
70 grams coconut oil
109 grams shea butter
13.6 grams cocoa butter
30 drops red raspberry seed oil
82.5 grams non-nano zinc oxide powder
Instructions
1. Melt the coconut oil and very carefully, using care not to inhale any power, add the zinc oxide powder.
2. Still using care not to inhale any power, stir the zinc oxide powder into the coconut oil.
3. Add the shea butter and cocoa butter, warm a little more if needed, and stir until evenly blended.
4. Add the red raspberry seed oil and stir again until evenly distributed.
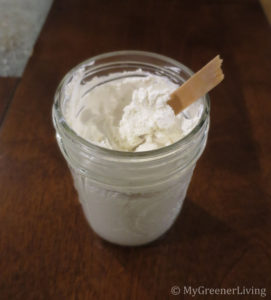
Store in an airtight container. I store in a mason jar and scoop out as needed. You could store in a squeeze tube, but since this sunscreen is very thick, it may be difficult to squeeze out.
How I use my homemade natural sun screen
To use this sunscreen, scoop or squeeze out a liberal amount.
Apply to all exposed skin and rub in well to blend the white zinc oxide into your skin. Reapply every hour or two, or as you determine necessary for your skin.
Since the sun protection in this sunscreen comes mostly from the physical zinc oxide granules, you can apply sunscreen any time before going out in the sun (it’s the chemicals in traditional sunscreen that need 20 minutes to sink into your skin to provide protection).
I am estimating that this homemade natural sun screen provides about SPF 20 or 25, mostly from the zinc oxide. Due to the thickness of the shea butter and cocoa butter, this sunscreen seems to be sweat resistant and water resistant. However, I highly recommend reapplying after swimming or excessive sweating.
Combining this sunscreen with a UPF hat and shirt I was able to keep my pale skin pale and protected from UV damage all summer!
Cost
Organic coconut oil – $14.99 for 54 oz (1458.99 g) at BJ’s Wholesale Club; (70g/1458.99g)x$14.99=$0.719 (or on Amazon for $16.99)
Organic shea butter – $11.70 for 1 lb (453.59 g) on Amazon; (109g/453.59g)x$11.70=$2.812
Organic cocoa butter – $15.15 for 1 lb (453.59 g) on Amazon; (13.6g/453.59g)x$15.15=$0.454
Organic red raspberry seed oil – $8.37 for 1.1 oz (650 drops) on Amazon; (30 drops/650 drops)x$8.37=$0.386
Zinc oxide powder – $8.95 for 1 lb (453.59 g) on Amazon; (82.5g/453.59g)x$8.95=$1.628
Total: $6.45 for 1 cup (275.1 grams = 9.7 oz), equating to $0.665 per ounce weight
For comparison, the Raw Elements sunscreen is currently $16.14 for 3 fluid ounces (which is about 2.88 ounces by weight based on approximate butter weights, or $16.14/2.88=$5.60 per ounce weight). My sunscreen is $0.665/$5.60=0.11875 or 12% the cost of the Raw Elements sunscreen. I’d say my homemade natural sun screen is a great price compared to the commercially available product on the market. Using this sunscreen will definitely help me save some money while protecting my skin!
Have you tried any natural or homemade sunscreens?